


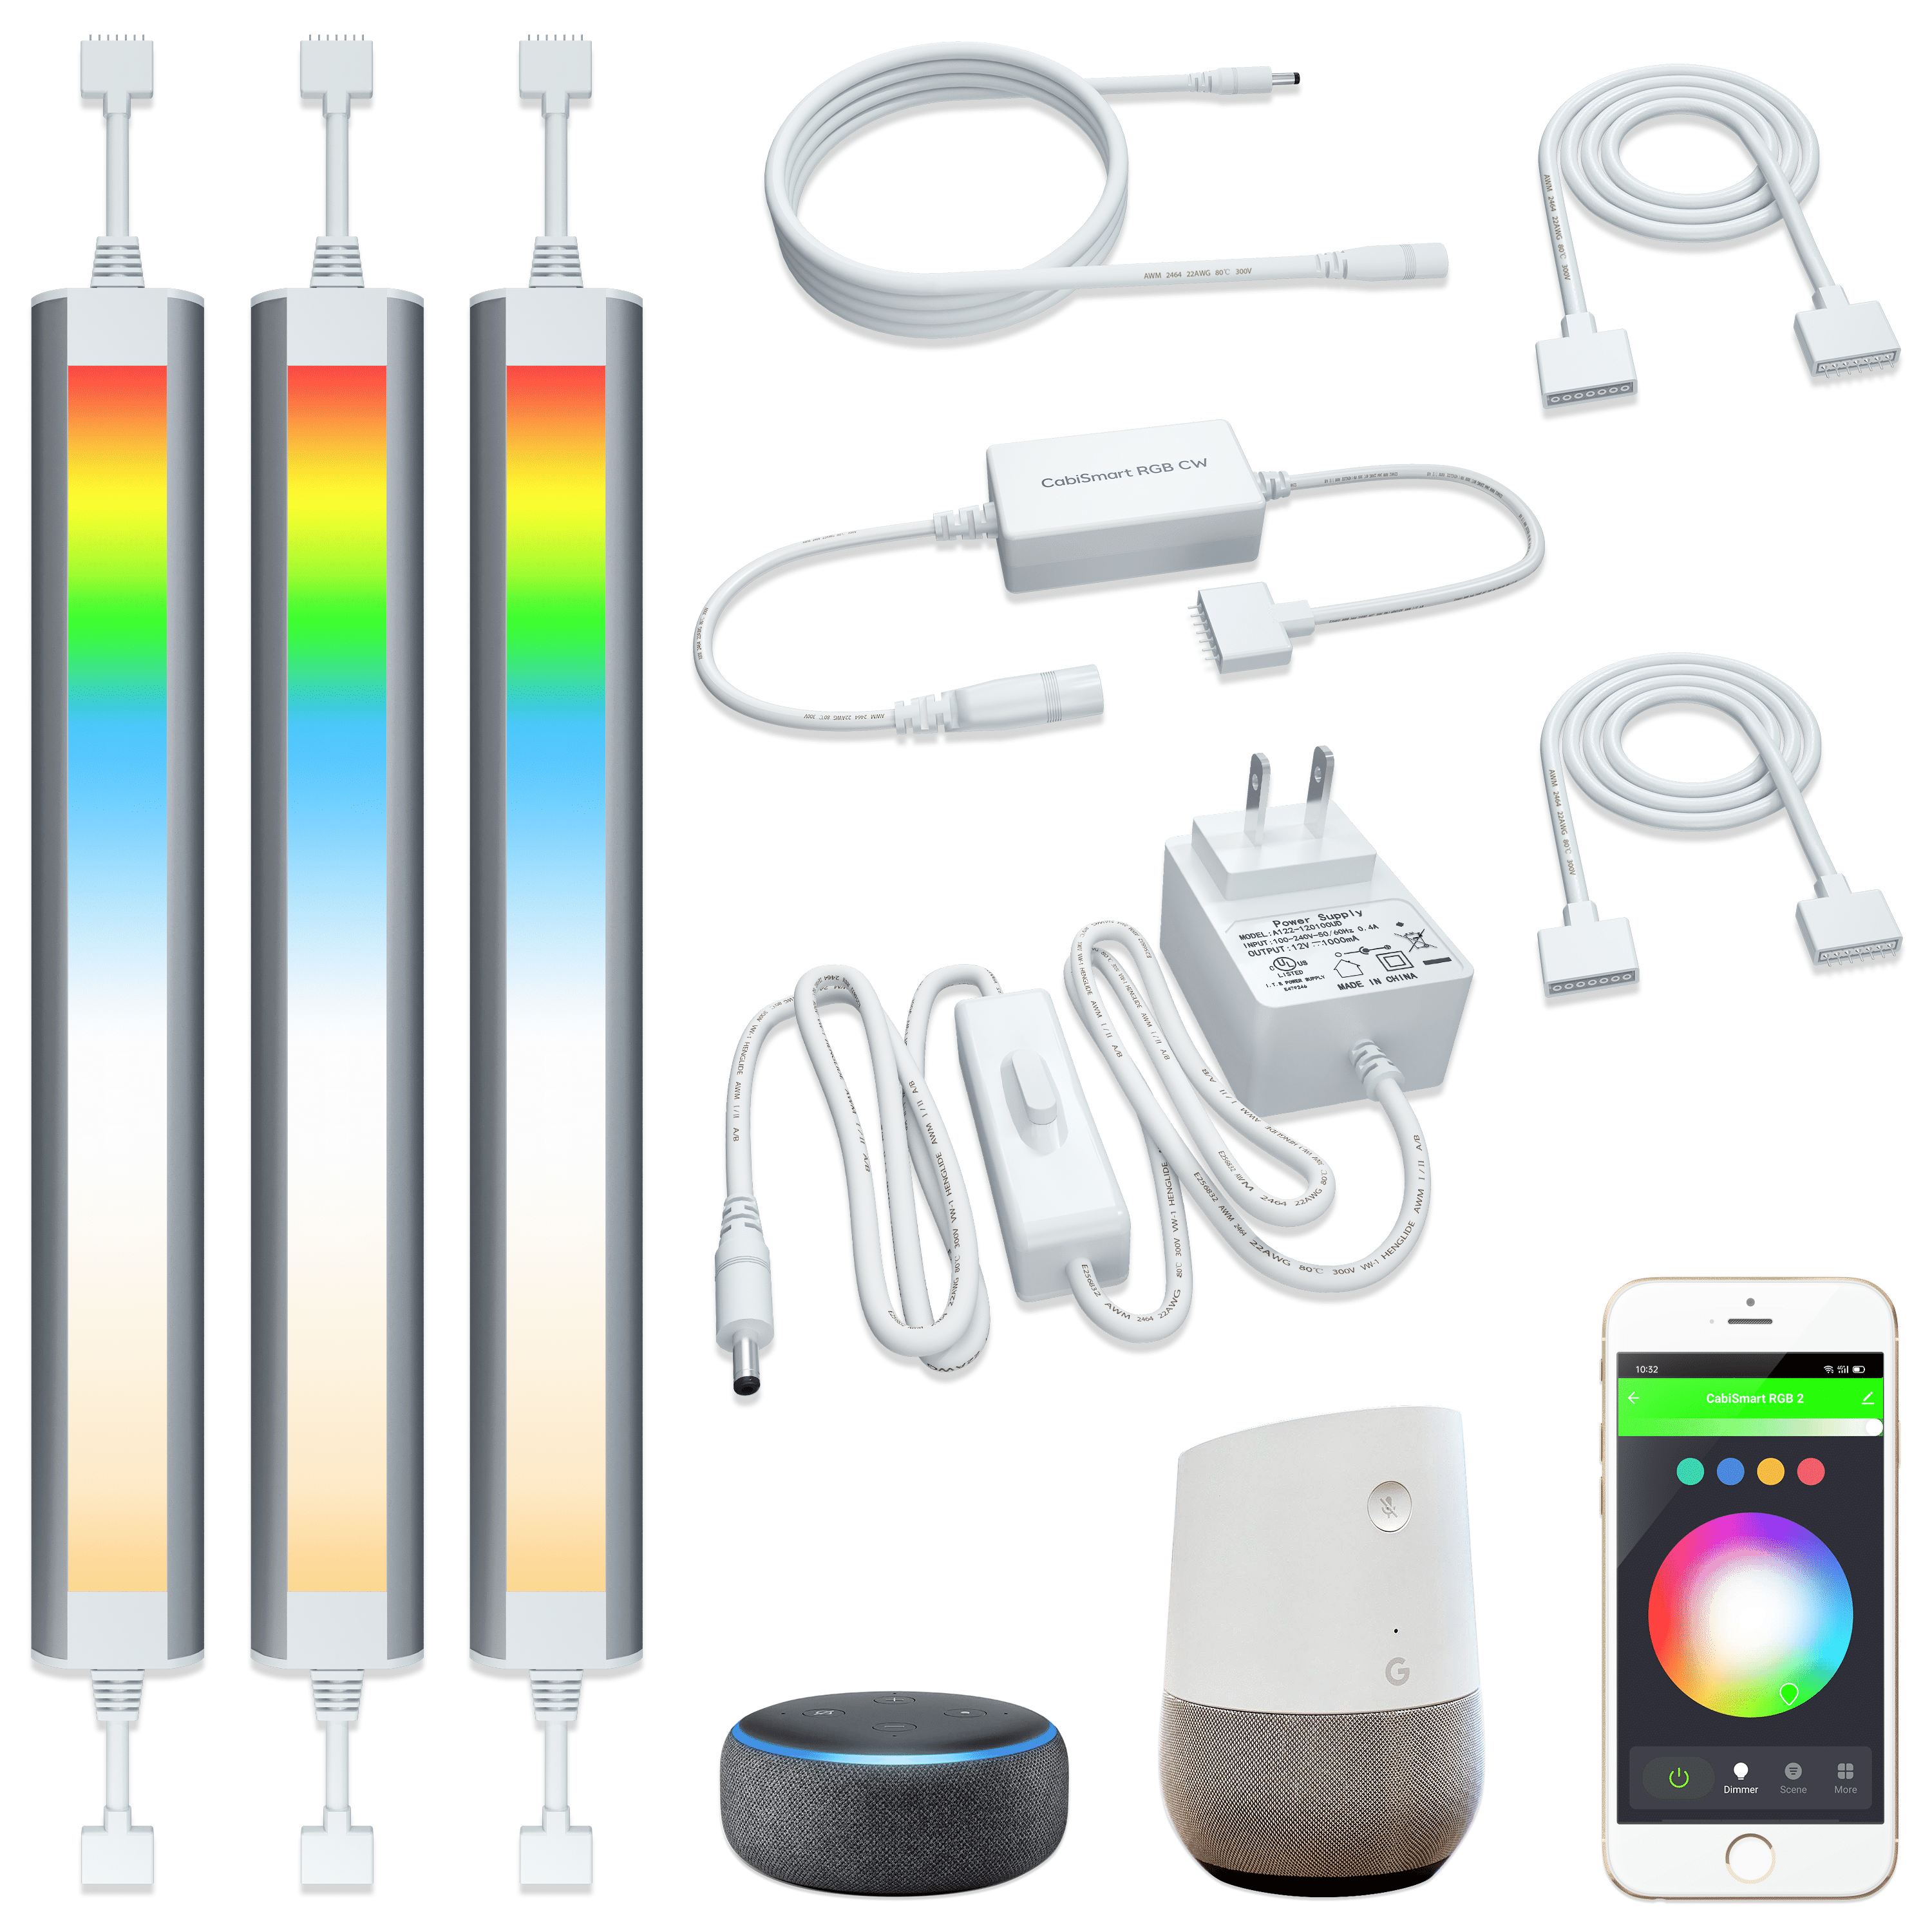
Item Name: CabiSmart CW
Size: 12" 3-Bar Lights Kit
Voltage: 120VAC for Transformer , 12VDC for Control and Lights System.
Wattage: 4 Watt Per Lights Bar 12 Watt for Whole Lights System
Luminous Flux: 960 lumens
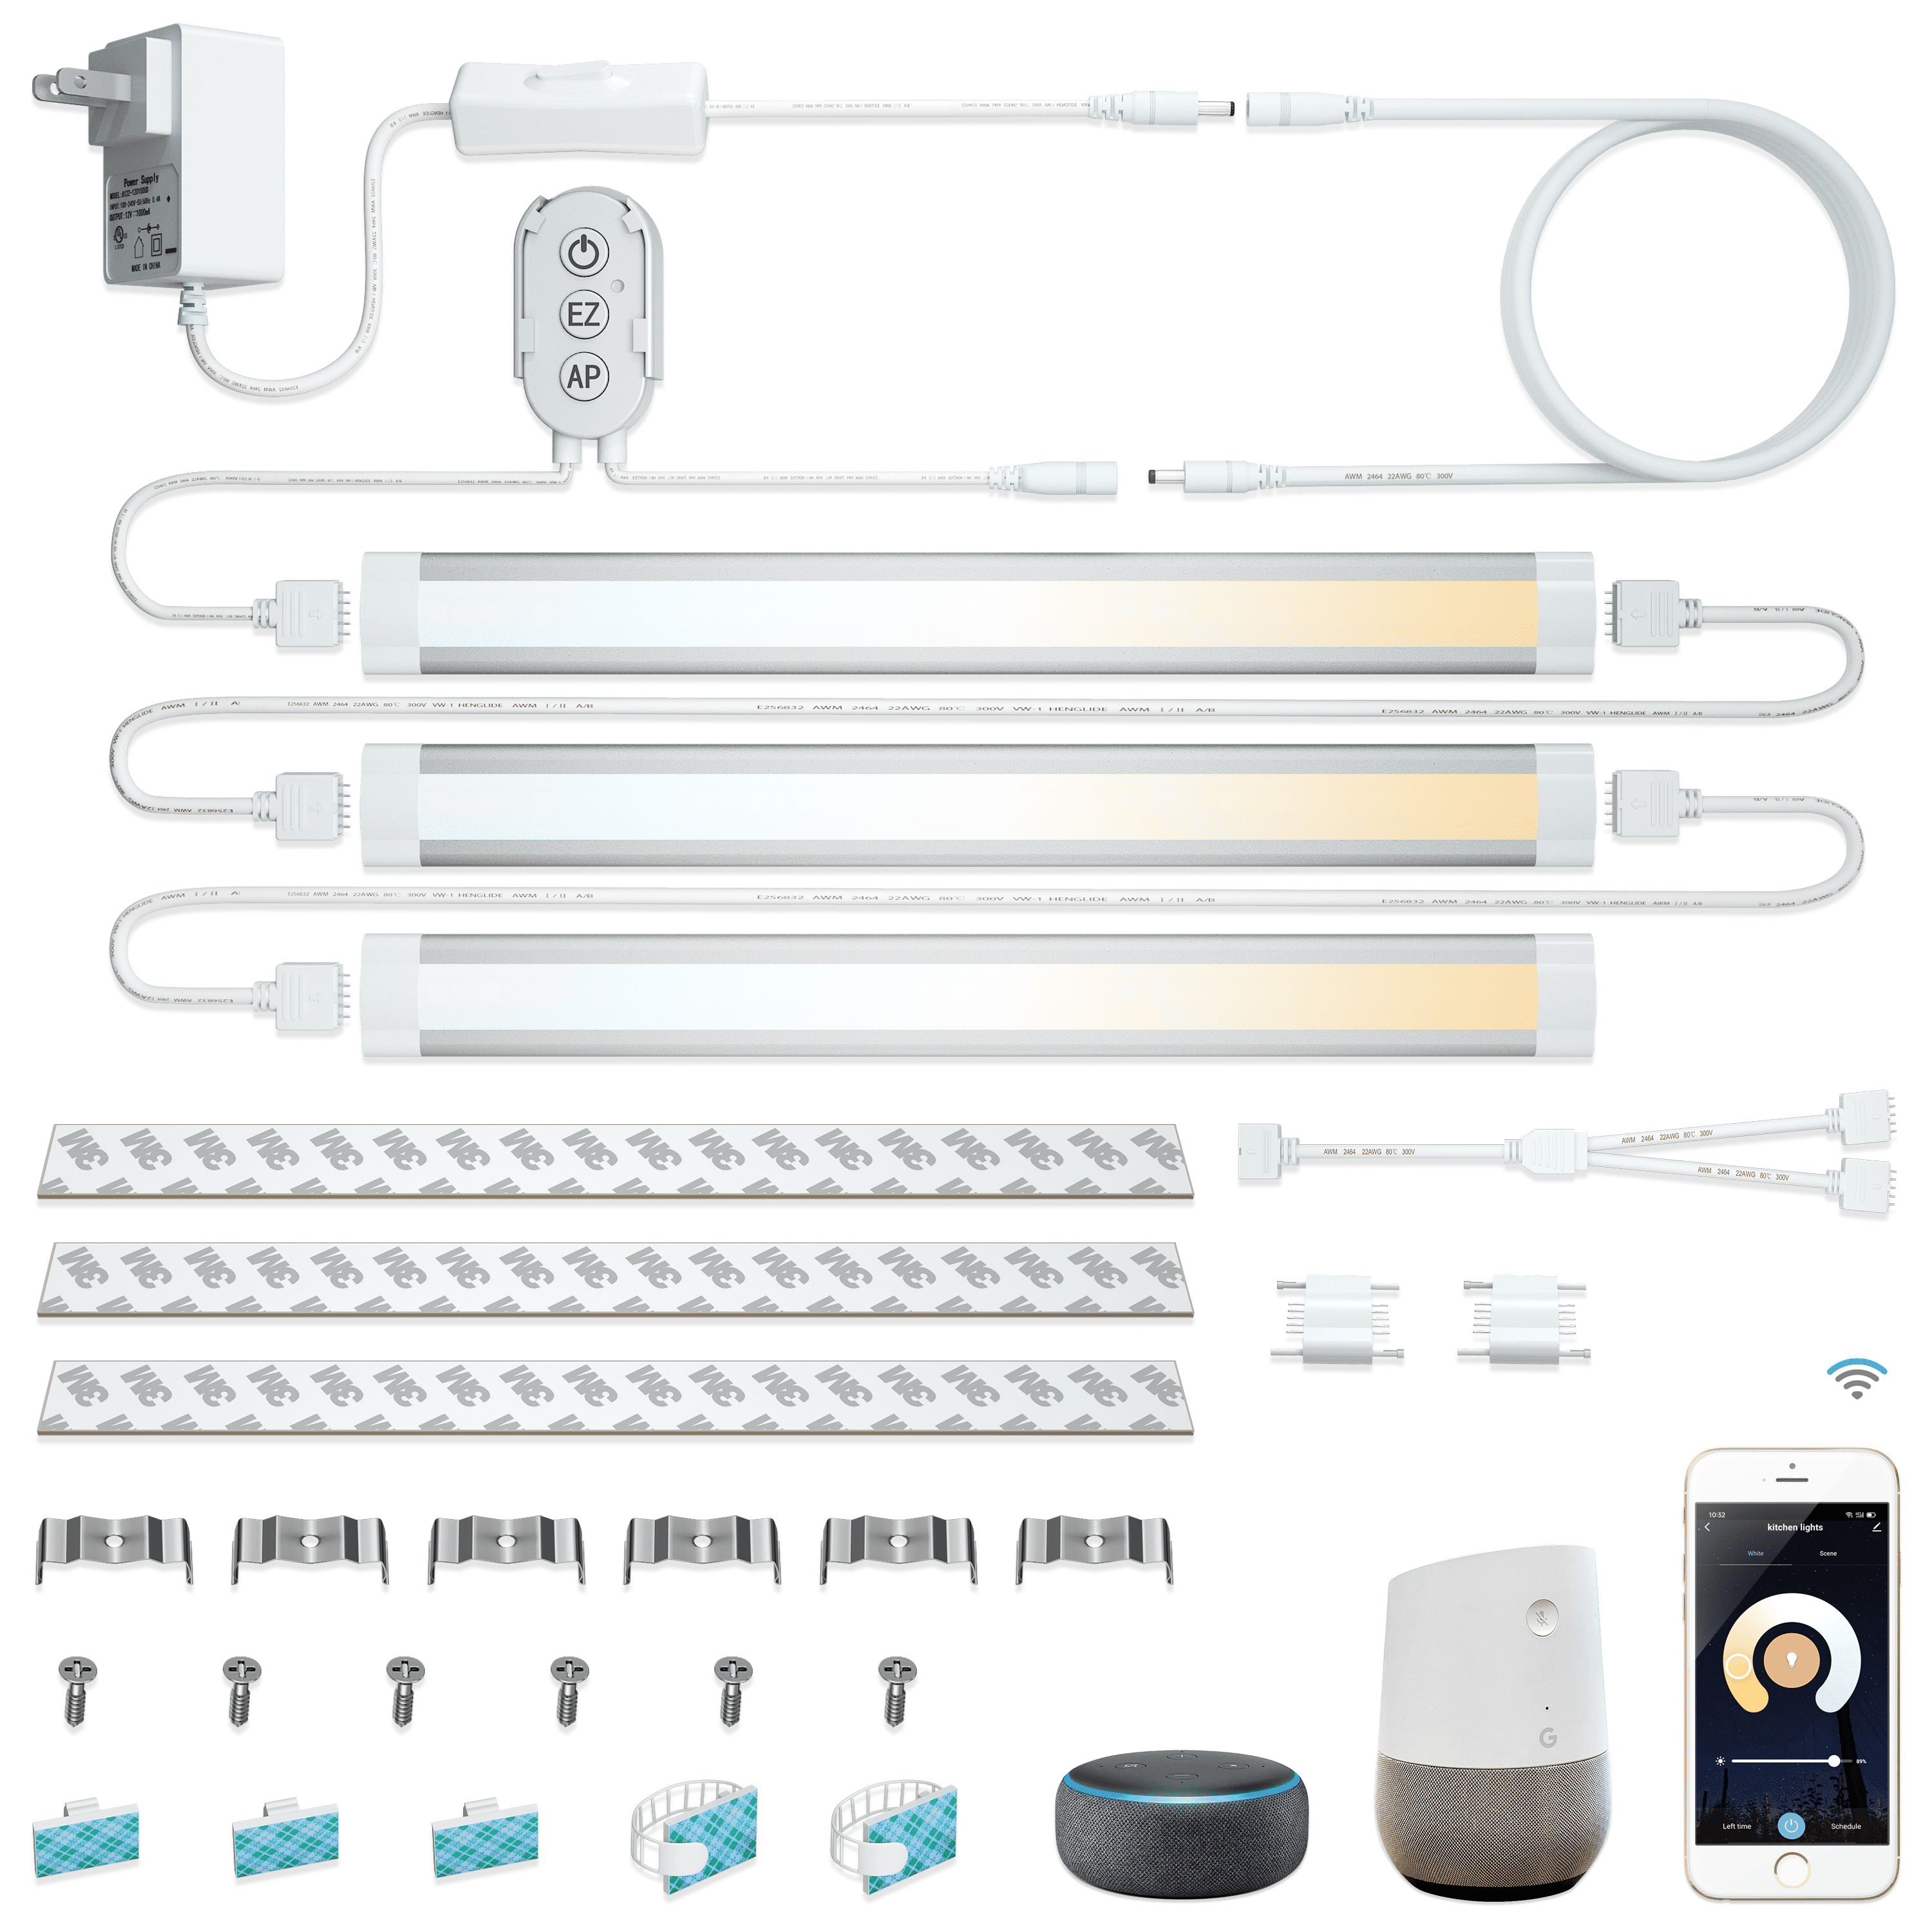
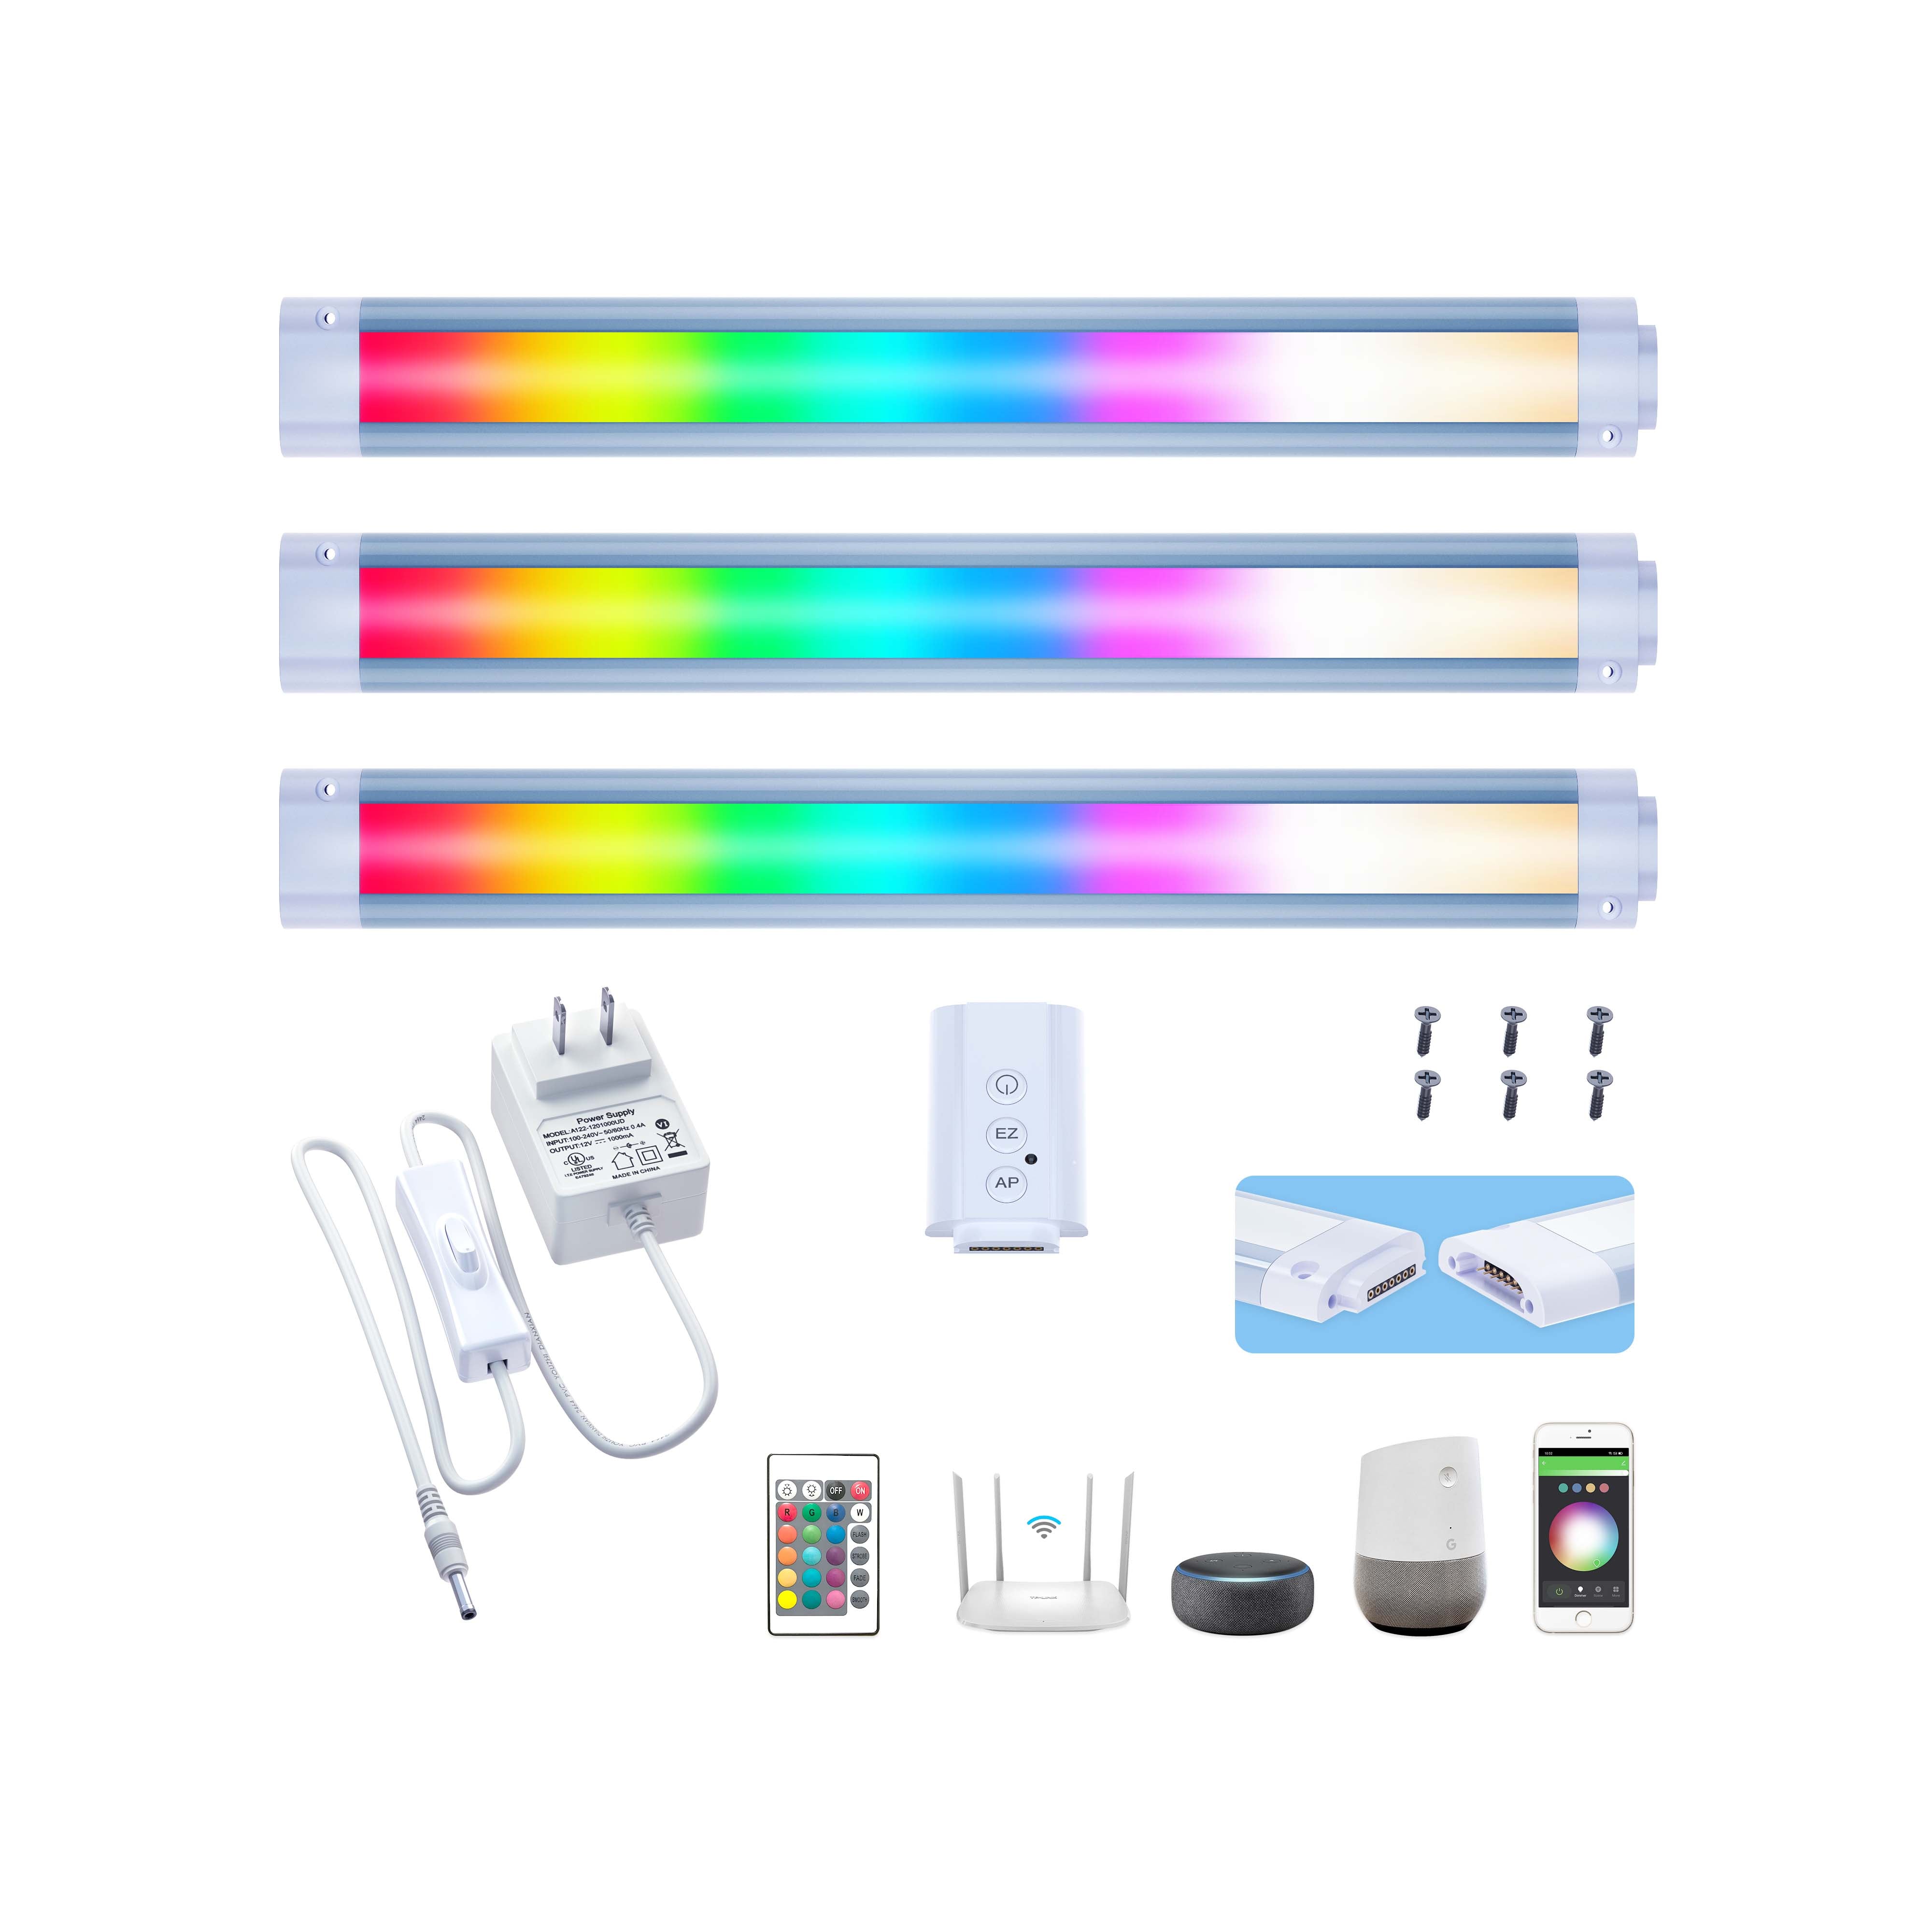
Control Solution: Manual Switch, App Control , Alexa, Google , SmartThings.
Color Temperature: 2700-6500K Adjustable
Dimmer Support: Dimmable by App, Alexa, Google. Do not compatible with tranditional dimmer switch.
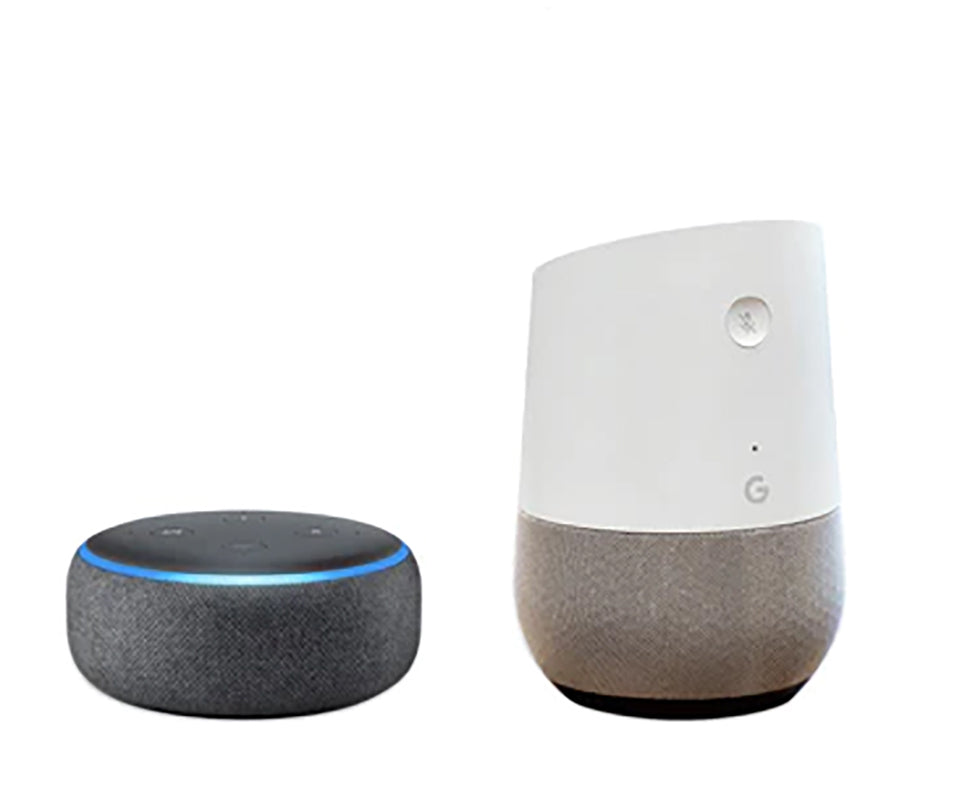
Use Amazon Alexa or Google Assistant to control your lights device. Control the lights by voice.
Alexa, Turn on the kitchen lights
Alexa, Set the bedroom lights to warm white
Alexa, Set the Kicthen lights to 50%
| Appearance |
|
|
|
|---|---|---|---|
| Mode Name | CabiSmart CW 12"3-Bar Kit | CabiSmart RGBCW 12"3-Bar Kit | BarSmart RGBCW 12"3-Bar Kit |
| Color | 2700K-6500K White | 2700K-6500K White and Color | 2700K-6500K White and Color |
| Control Solution | App, Alexa , Google | App, Alexa, Google | App Alexa, Google, Remote |
EZ mode: Firstly,make sure the device is powered off for more than 10 seconds before powering on the device. Then press the EZ button, and wait for a few moments until the lights starts blinking rapidly and the device enters to EZ mode, you can connect the network according accord to the user manual.
AP Mode: Firstly, make sure the device is powered off for more than 10 seconds before powering on the device. Then press the EZ button, and wait for a few moments until the lights starts blinking rapidly. Repeat another 3 times on and off. Wait for a few moments the lights starts blinking slowly and the device enters to AP mode. You can configure the new work according to the user manual.
If you use auto scan search network feature and can not search your device by App. For Wi-Fi products App location permission should be enabled, and smart phone need to be connected to the Wi-Fi. CabiSmart CW is both for Wi-Fi and Bluetooth.
For Bluetooth products: Need to enable the Bluetooth and App location permission. Wi-Fi and Bluetooth dual-mode device can be searched by Bluetooth so you need to enable the mobile phone and Smart Life App use Bluetooth permission.(CabiSmart CW is both for Wi-Fi and Bluetooth)
If you your device is among the above types but still can not be searched please confirm whether your device is under pairing mode (Press EZ button and the lights blinking rapidly) or you can try to add it manually.
If you use Add Manually to add the device to the Smart Life App please following the steps below for troubleshooting.
1.Please read the User manual carefully and download the correct App by the QR code in the user manual.
2.Please user routers from the brands such as ASUS, Netgear, TP-Link etc (routers provided by telecom operators with poor compatibility due to the need to accommodate some telecom operator functions and can not add the smart devices)
3.Please confirm that your router is a Wi-Fi 5 router or turn off the Wi-Fi6/802.11 ax mode of the 2.4G Wi-Fi in the Wi-Fi 6 router. Our device can not be connected to Wi-Fi 6 standard Wi-Fi.
4.Please confirm that the Wi-Fi password encryption method of your router is WPA2-PSK/WPA and the wireless mode can not be 11n only.
5.Please confirm if the entered Wi-Fi pass word is correct or not.
6.Wi-Fi need to be broadcasted. Can not be set to hidden and make sure that the mobile phone is using 2.4GHz Wi-Fi when you add the device.Please check if your 2.4GHz and 5GHz mixed Wi-Fi with the same Wi-Fi name and code.If yes please edit them as different Wi-Fi name and connect your smart phone to 2.4GHz Wi-Fi.Please check if the 2.4G band and 5G band share a same Wi-Fi account, if so please change it as different accounts and switch to 2.4G during your configure the network.(refer to Troubleshooting 7).
7.Make sure the router DHCP service enabled (refer to Troubleshoot 8).
8.Make sure the device is powered and under network configure mode (EZ or AP mode).
9.If your device is a Wi-Fi device please add your device manually , and “ Add Automatically” may not discover your device.
10.If your smart phone is IOS 14 or above please confirm that the local network permission and wireless date permission for the Smart Life APP were enabled.
11.If the binding process prompts that the device has been bound to another account, please follow the page prompts to unbound the device and them re-add it.
12.Please confirm that the network environment where the device is located has a strong and stable signal.Solution:Download the network speed test App(make sure the phone is connected to the 2.4GHz network), place your phone the sample position as the device, and then test the network upload and download speed at that position. Make sure the speed is at least:upload≥2MBs, download≥2MBs or upload≥16 Mbps, download≥16Mbps
13.If the network is normal but the device fails to connect please confirm whether the router is overloaded. You can try turning off the Wi-Fi function of a device to free up channels for reconfiguration.
14.If the router has wireless MAC address filtering enabled, you can try removing the device from the router’s MAC filtering listing to ensure that the router does not block the device from connecting the network, or turn off MAC address filtering.
If all of the above situations have been ruled out and your device still can not connect to the network, you can provide us with your App account and we will arrange a professional engineer to conduct in-depth troubleshooting for you
Please check in the following ways:
1.Pairing a Bluetooth device needs to be added in our App, not the Bluetooth adding interface of the phone.
2.Make sure the Wi-Fi switch of your phone is on,and the router is working normally.
3.Your phone must be connected to the network,when paring a Bluetooth device,(because the Bluetooth device needs to be registered on the cloud server to be added successfully).
4.If you use an Android phone, you must open the App's location permission.
As the Android mobile phone system considers Bluetooth broadcast to have a positioning function, so it must authorize the positioning permission before scanning for Bluetooth devices. Therefore,only after you turn on the location permission of our App in the phone permission settings,then you can scan the Bluetooth device normally, so that you can correctly add the Bluetooth device to our App.
5.The device may have been added, it is recommended to reset the Bluetooth device and add it again.
6.Whether the distance between the Bluetooth gateway and the Bluetooth device is moderate (less than 3 meters or 10 ft ),it is recommended to be as close as possible (if there is no Bluetooth gateway, you can skip it, just connect to the phone directly).
7.Check whether there are other users around using the Bluetooth device (the Bluetooth device can only be controlled and used by one user at the same time due to its characteristics, and it will be offline when other users are using it).
8.The Bluetooth device you added is not our product.Bluetooth devices have certain private protocols,so other brands of Bluetooth devices cannot be added to our App(even if they are added successfully,they cannot be controlled)
You can verify whether it is a network problem or a product hardware problem in the following ways:
1.You need to reset the device to EZ mode.(Refer to troubleshooting 1)
2.Unless otherwise specified,the devices only support 2.4GHz Wi-Fi. There is a possibility that the 2.4GHz and 5GHz mixed network will not be successfully configured, so please ensure that the Wi-Fi connected to the mobile phone is 2.4GHz.
3.Please ensure that the Wi-Fi password is correct and the device is near the router.
4.You need to prepare two mobile phones, one mobile phone to open the hotspot as a network provider (instead of a router), the other mobile phone can be used to connect the device.(Recommend).
5.If you can connect and operate the device through the above methods, it means that there is a problem with your router settings, or the router compatibility is not good.
6.Switch to AP mode and pair the device. If it succeeds, it means that the router is not compatible.
7.If you still cannot connect and operate the device through the above methods, it may be a hardware problem.
If it is a hardware problem, you can contact the seller and ask for the after-sale services
You can verify whether it is a network problem or a product hardware problem in the following ways:
1.You need to reset the device to AP mode.(Refer to troubleshooting1)
2.Using a mixed network of 5GHz and 2.4GHz, or a 2.4GHz network, if the connected network is only 5GHz, it cannot be connected.
3.Ensure that you are connected the correct Wi-Fi hotspot (the hotspot name of the device usually starts with SmartLife-XXXX).
4.Make sure the phone is fully connected to the hotspot of the device before returning to the App.
5.Some mobile phone systems mistake the device's hotspot network as an insecure network, and therefore cannot connect.You need to set it in the phone settings before you can connect.
6.If you get stuck in the Register to Cloud step during the connection, the device may not be compatible with the router.
7.If you still cannot connect and operate the device through the above methods,it may be a hardware problem.
If it is a hardware problem,you can contact the seller and ask for the after-sale services
Please confirm whether your device is in the following types:
1.Wi-Fi devices: Only Wi-Fi devices that support lightning network distribution and have HomeKit functions can be discovered in Auto Scan. App location permissions need to be turned on, and mobile phones need to be connected to Wi-Fi.
2.Wired device: the mobile phone and the device need to be under the same router.
3.Bluetooth device: need to turn on Bluetooth and App location permission (Wi-Fi & Bluetooth dual-mode devices can be searched through Bluetooth, so the mobile phone needs to turn on Bluetooth).
4.Zigbee sub-device: Zigbee gateway needs to be configured. If you have multiple Zigbee gateways, you need to manually select the Zigbee gateway.
If your device is among the above types but still cannot be searched, please confirm whether your device is in the pairing mode (see how to reset the device to the pairing mode, refer to troubleshooting 1), or you can try to add it manually.
If your router supports both the 2.4 GHz and 5 GHz bands, but only one Wi-Fi name is displayed on the Wi-Fi search page of your mobile phone, perform these steps:
1.Go to the Wireless page of the router. (The entry address is usually provided on the label attached to the back of the router).
2.Go to the 2.4 GHz setting page, and set the Wi-Fi name (SSID) to (XXX)-2.4G, where xxx indicates the Wi-Fi name. Save setting.
3.Go to the 5 GHz setting page, and set the Wi-Fi name (SSID) to (XXX)-5G, where xxx indicates the Wi-Fi name. Save setting.
When the preceding settings are complete, the new Wi-Fi names will Appear on the Wi-Fi settings page of your mobile phone.
Note: After the Wi-Fi names are changed, you need to reconnect the devices that use this wireless router. The password remains the same if it has not been changed.
If the DHCP function of the router is disabled, IP address conflicts may occur when multiple home devices are connected to the router. To solve this issue, perform these steps:
1.Go to the LAN page of the router.
2.Locate the DHCP setting option.
3.Enable DHCP.
4.Save setting.
If the lights worked under reset/pairing mode the lights will blinking.
Solution1: Add the lights to Smart Life App once the lights added successfully ,the lights will stop blinking and you can use App , remote (if the products with remote) or The third party control to operate the lights.
Solution2:If you do not want to use App or your have trouble to add the lights by App.
Please do the steps below to stop the blinking
Step 1. Turn off the lights after the lights blinking 10 seconds or more.
Step 2. Wait another 10 seconds or more
Step 3. Turn on the lights again, the lights will exit the reset or pairing mode and stop blinking.
Link CabiSmart CW system (as Fig 1)
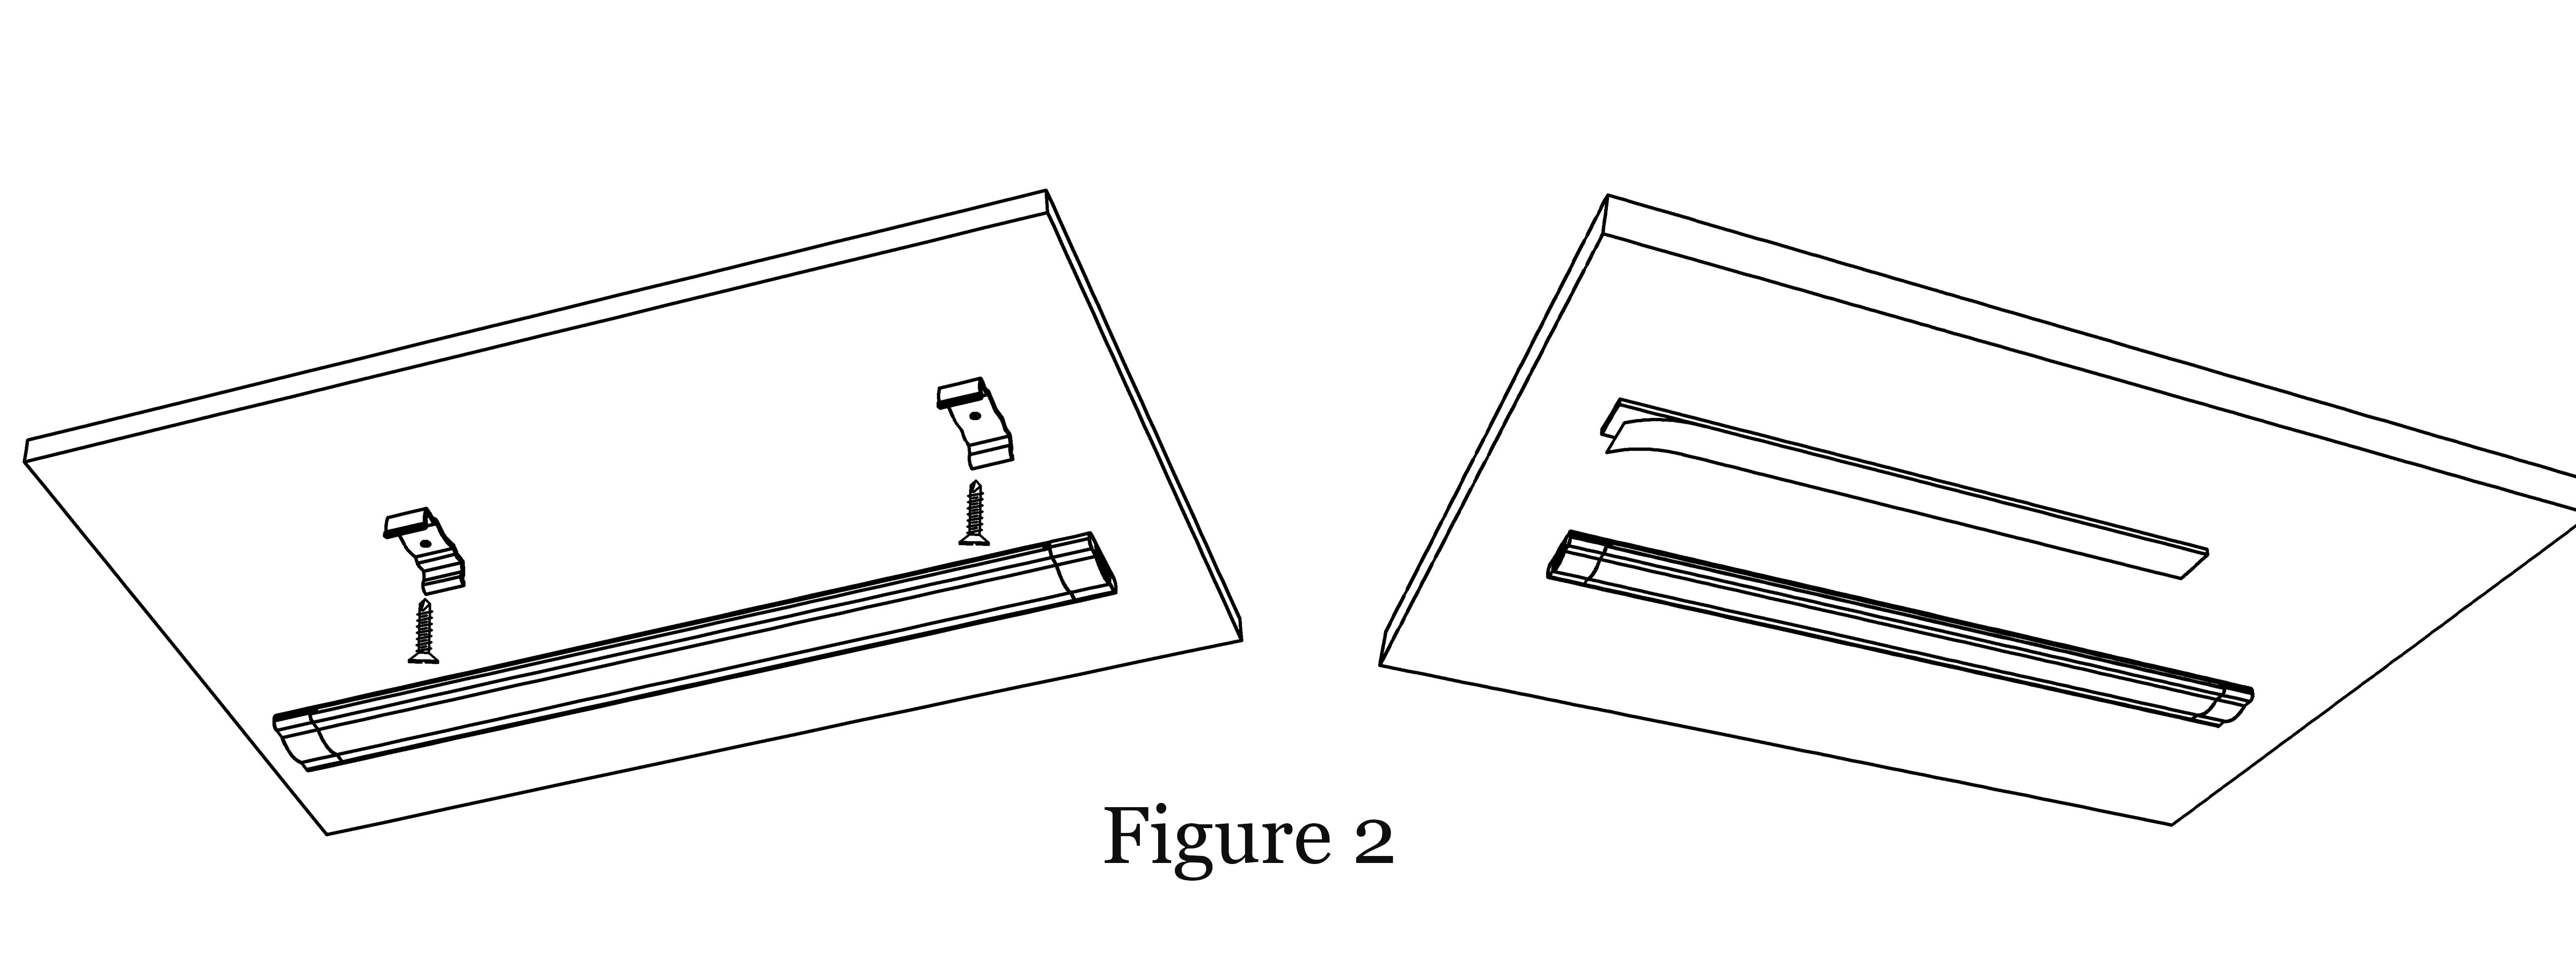
1.Fix the light bar by screws or adhesive tape (as show in Fig2)
2.Link the lights bar by jumper cord or in-line connector. (as show in Fig3)
3.Link the lights bar to the control box. If the layout for lights bar is in two side you need to use a Y shape jumper cord (as show in Fig 4)
4.Fix the control box to your cabinet (as show in Fig 5)
5.Plug the transformer to your wall switch. If the cable is not enough you can order DC jumper cord or 5 pin jumper cord to extend the installation